Feeling Stuffy. Try This DIY Vapo-Rub Alternative
You can make your own powerful vapor rub using natural essential oils that open airways and ease congestion. Start with organic coconut oil as your base, then add therapeutic oils like eucalyptus, peppermint, and tea tree. This blend triggers your body’s cold receptors while fighting germs naturally. Simply massage a thin layer onto your chest and neck for instant relief. Discover how this homemade remedy offers a pure, effective alternative to commercial products.
The Science Behind Vapor Rubs
The secret lies in their aromatic essential oils that trigger your body’s cold receptors. When you apply a natural vapor rub, these oils stimulate nerve endings in your nasal passages. This creates a cooling sensation that tricks your brain into feeling like you’re breathing more clearly. It also helps reduce inflammation and discomfort. Additionally, natural remedies such as steam inhalation and hydration can enhance the effectiveness of these vapor rubs.
Essential Ingredients for Your Natural Blend
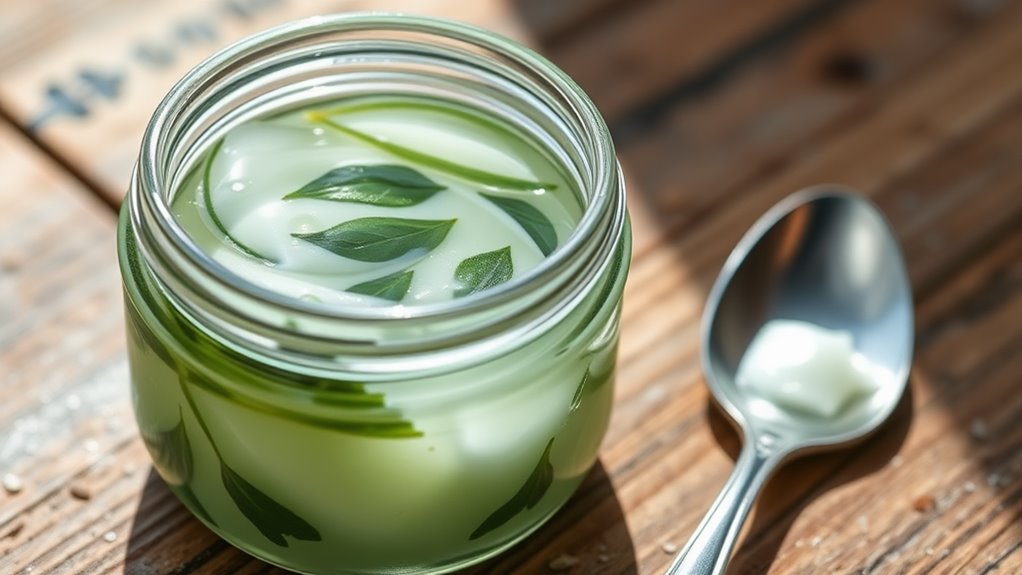
To create your own natural vapor rub, you’ll need skin-nourishing base oils like coconut or jojoba oil that carry and dilute your therapeutic essential oils. The most effective essential oils for respiratory support include eucalyptus, peppermint, and tea tree, which offer natural antimicrobial properties and soothing aromatherapeutic benefits. Additionally, using these essential oils can help open airways for easier breathing, providing instant relief from nasal congestion. Store your finished blend in a dark glass jar with a tight-fitting lid to protect the oils’ potency and extend their shelf life.
Must-Have Base Oils
Creating a healing vapor rub starts with selecting the right base oils, which serve as natural carriers for your therapeutic blend.
You’ll want to use organic coconut oil as your primary base, thanks to its antimicrobial properties and smooth consistency.
Add olive oil or sweet almond oil as secondary carriers to enhance absorption and provide additional skin-nourishing benefits to your homemade remedy.
Natural Antimicrobial Essential Oils
Essential oils form the powerful healing core of your homemade vapor rub, with each oil contributing unique therapeutic properties.
You’ll want to include eucalyptus for respiratory support, peppermint for decongestion, tea tree for its antimicrobial action, and lavender for its soothing effects.
Rosemary and thyme oils add extra antimicrobial power while supporting clear breathing.
Storage Container Tips
Proper storage containers play an essential role in preserving your homemade vapor rub’s therapeutic properties.
Choose dark amber or cobalt blue glass jars to protect essential oils from light degradation.
Make sure your container has an airtight lid to prevent oxidation.
A wide-mouth jar allows easy access when applying the rub.
Store in a cool, dark place for maximum shelf life.
Step-by-Step Mixing Instructions
You’ll want to begin by carefully measuring your carrier oils and essential oils using precise droplet counts to guarantee proper dilution ratios.
When blending your essential oils, start with the more potent oils first, like eucalyptus and peppermint, before adding gentler ones like lavender or tea tree.
Once you’ve measured your ingredients, you can combine them in a small glass bowl, mixing gently with a non-metal spoon until they’re fully incorporated.
Steam treatment can enhance mucus drainage, making your DIY Vapo-Rub alternative even more effective.
Understanding Ingredient Measurements
The art of crafting your own vapor rub begins with precise measurements to guarantee a balanced, therapeutic blend.
You’ll need 1/2 cup of coconut oil, 20 drops of eucalyptus oil, 15 drops of peppermint oil, and 10 drops of lavender oil.
For extra decongestant power, you can add 8-10 drops of rosemary oil or tea tree oil.
Blending Essential Oils Together
Mindful blending starts with creating a harmonious environment for your essential oil mixture.
You’ll need a clean glass bowl and dropper to begin your wellness journey.
- Add 15 drops of eucalyptus oil as your base note
- Follow with 10 drops of peppermint for respiratory support
- Include 8 drops of lavender to soothe and calm
- Finish with 5 drops of tea tree for immune support
Safe Application and Usage Tips
Once you’ve created your natural vapo-rub blend, proper application guarantees both safety and effectiveness.
Apply a thin layer to your chest, neck, and back, avoiding sensitive areas like eyes and mouth.
Don’t use on broken skin or children under two.
For best results, apply before bedtime and cover with a warm cloth.
Store your blend in a dark glass container away from direct sunlight. Regular application may enhance steam therapy’s benefits, promoting better respiratory health.
Storage and Shelf Life Guidelines
Proper storage techniques go hand-in-hand with safe application practices when maximizing your natural vapo-rub’s potency and longevity.
- Store your DIY vapo-rub in a dark amber glass jar with an airtight lid to protect essential oils from light degradation.
- Keep in a cool, dry place below 75°F (21°C).
- Label your jar with the preparation date – most blends last 6-8 months.
- Check for changes in color, texture, or scent before each use. Incorporating essential oils for stress relief into your routine can enhance the overall experience of using your vapo-rub.
Benefits of Natural Vs Commercial Options
While commercial vapo-rubs offer convenience, natural alternatives provide a cleaner, more sustainable approach to respiratory wellness.
You’ll avoid petroleum byproducts, artificial fragrances, and synthetic preservatives commonly found in store-bought versions.